You might be wondering how to put up shelves with brackets. Installing our metal shelf brackets and other hardware is probably easier than you think. With a few tools and a little preparation, and our installation guide, these can be easy DIY projects.
Many of the same tools and tips work for installing our other hardware like floating shelves, metal hooks, coat racks, towel bars, and other projects (see below for specific tips).
Shelf Bracket Installation Guide
Floating Metal Shelf Installation Guide
As a general rule, it's always ideal to install shelf brackets and hardware into wall studs. However, it can be difficult to arrange placement and also hit a wall stud.
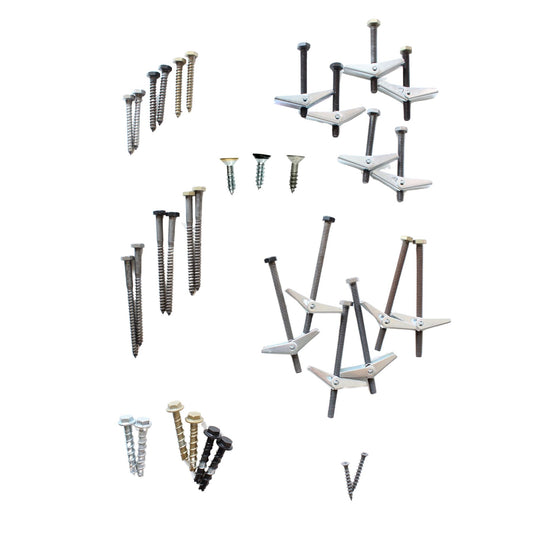
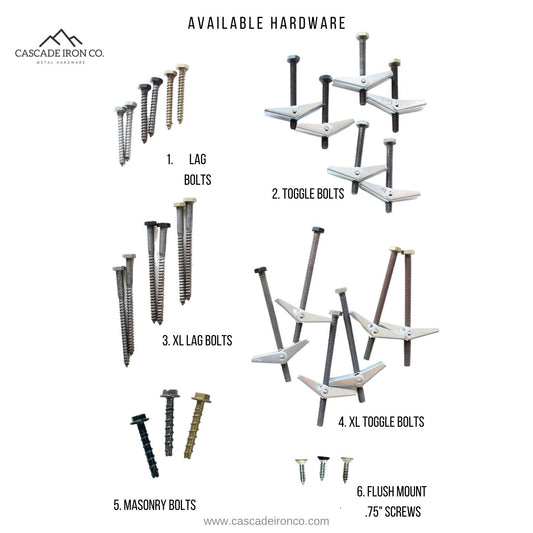
When a wall stud is not an option, we recommend using a toggle anchor bolt. We have matching toggle bolt kits available separately.
If installing brackets or shelves into tile, brick, or extra thick dry wall, please read below for further recommendations.
Recommended Tools:
-
7/16" Wrench or Socket (we caution against using an impact driver/drill as this may cause damage to bolts/brackets)
-
Level
-
Electric Drill with 3/16" bit for pilot holes
-
Pencil & Masking Tape
-
Lag Bolts (included with each order and intended for installation into wall studs. Use specialty hardware if needed )
-
Electronic stud finder can be helpful
- For the items that use a screw, we recommend a #3 Philips Screwdriver (with a 1/8" pre-drilled hole in the wood)
1. Confirm Shelf Details
- Is bracket correct size for shelf?
- Are there enough brackets for shelf length? Longer shelves need more brackets
- Is the bolt hardware correct for the application?

2. Determine Shelf Placement
Place a long piece of masking tape horizontally along the wall, spanning the length of your piece of wood shelf. This also gives a great visual of how your shelves will look before making the commitment!
Using a level, mark a level line along the tape. Note, we recommend not placing the shelf brackets any further than 3" in from each end of the shelf.
3. Locate wall studs
Using a stud finder or another method, locate wood wall studs. Using a pencil or pen, mark the wall stud locations along the level line.
Note: Many projects require a combination of lag bolts and toggle bolts. One bracket may hit a wall stud while the others may need toggle bolts. Because the hex head on our bolts are the same, the final project looks cohesive.
4. Pre-drill holes
For lag bolts, pre-drill a 3/16" hole where the level line and studs intersect. This will make it easier to install the bolts and also reduces the likelihood of bolt head breaking. This is crucial. Bolts can break without a proper pilot hole.
5. Remove Tape
Remove tape from the wall and the pre-drilled holes will be remaining to easily install the brackets.
6. Install Brackets
Using a wrench or socket, install the brackets with the provided bolts. Be sure not to over tighten as this may cause any bolt head to break.
7. Add Wood Shelves
Now that the brackets are securely in place, carefully lay the wood shelves on top of the bracket.
J Brackets
J brackets will hold the board within the front lip. The board will use gravity and the bracket engineering to stay in place.
L brackets
L Brackets, (no front lip) require wood screwed directly onto bracket arm. This can be best done by resting the board on the brackets and marking hole placement. Then remove shelves, pre-drill holes on secure surface. Replace boards and tighten to bracket using provided bolts or screws.
Installation Without Wall Studs:
When wall studs are not available, we strongly suggest using toggle bolts. They are an expandable anchor that grips the back side of the drywall. They are easier to use than they look.
We have them available for purchase that match our other hardware, which is preferred if you are mounting some brackets into studs and others with the toggle bolts. They can also be found at any local hardware store.
For our toggles, pre-drill a 5/8" hole.
Toggle Bolt Video
Installation On Other Surfaces:
Our shelf brackets and other hardware can be installed onto other surfaces including tile back splash and brick. The general instructions remain the same though there are a few more tips for a successful installation.
Tile Back Splash Installation
When it comes to installing brackets onto tile we suggest pre-drilling out the tile with a masonry drill bit (also called diamond drill bit ).
For wood studs behind tile, a 5/16" drill bit it suggested.
Then, pre-drill a 3/16" hole in the wall stud where the level line and studs intersect. This will make it easier to install the bolts and also reduces the likelihood of bolt head breaking.
Drill through the tile but not through the wall stud. Then install brackets using provided lag bolts or XL lag bolts for thicks walls and tile.
If studs are not an option, follow the same directions using the toggle bolt guidelines above but with a 5/8" diamond drill bit.
Brick or Concrete Installation
To install onto brick, concrete or any other solid masonry surface, pre-drill a 1/4" hole in the brick/mortar with a masonry drill bits.
Then secure the brackets with engineered bolts which are for use with masonry. We also have masonry bolts available for purchase.
Other Hardware Installation:
In addition to shelf brackets, we create many other items including wall hooks, coat racks, towel bars, toilet paper holders, and more.
The installation for these items are very similar to the wall bracket installation outlined above. We recommend identifying placement and determining whether a wall stud is available. Also, consider instructions based on the type of surface (drywall, tile, brick). Follow installation guidelines accordingly.


